On this page
- What Is Red Oxide Flooring?
- What Are the Advantages and Disadvantages of Red Oxide Flooring?
- What Materials and Mixing Ratio Do You Need?
- How Is Red Oxide Flooring Laid, Step by Step?
- How Long Does the Floor Take to Cure?
- Can You Lay It Over Existing Tiles or Concrete?
- Which Rooms Suit a Red Oxide Floor?
- How Much Does Red Oxide Flooring Cost?
- How Do You Clean and Maintain the Floor?
- Red oxide flooring is cement mixed with red iron oxide pigment, trowelled and polished on site into one jointless surface.
- Pigment makers quote an oxide-to-cement ratio of 1:4 to 1:8 by weight, depending on how deep a red you want.
- Lay the floor in one continuous stretch, wait 24 hours, then keep it wet while it cures.
- Buff and polish only after the floor has dried for about a week.
- Clean with water or a pH-neutral cleaner; acids and bleach dull and etch the finish.
Red oxide flooring is a cement floor coloured with red iron oxide pigment, laid wet, trowelled smooth and polished by hand into a glossy, deep-red surface. This guide covers its advantages, the step-by-step laying process, curing and day-to-day upkeep.
What Is Red Oxide Flooring?
Red oxide flooring is a thin cement topping tinted with iron oxide, the same stable mineral pigment that colours many bricks and paints. The colour runs through the topping, so it is not a paint or a coating.
It is a close cousin of IPS (Indian Patent Stone), the plain grey cement floor finished smooth on site. Add pigment to an IPS-style finish and you get an oxide floor.
Red oxide primer is a rust-protective paint for steel. Red oxide flooring uses dry pigment mixed into cement. Terrazzo and mosaic floors contain marble chips or come as factory-made tiles.
The floor is long associated with older homes in Kerala, Chettinad, Goa, coastal Karnataka and Kolkata, and architects now use it again.
What Are the Advantages and Disadvantages of Red Oxide Flooring?
The main advantages of red oxide flooring are a jointless, cool surface and low material cost. The main drawbacks are its dependence on a skilled mason and its slow curing.
Red oxide flooring: pros and cons
For indoor floors| Factor | Advantage | Disadvantage |
|---|---|---|
| Surface | Jointless, so no grout lines to clean | Hairline cracks can appear if curing is rushed |
| Comfort | Feels cool underfoot in hot weather | Slippery when wet, especially high-gloss finishes |
| Materials | Cement, sand and mineral pigment | Cement carries embodied carbon; it is not a zero-impact floor |
| Labour | Repairable and re-polishable on site | Results depend on the mason's skill |
| Look | Sheen deepens with age and polishing | Slight tone variation across a room; limited colours |
What Materials and Mixing Ratio Do You Need?
Red oxide flooring needs four materials: cement, red oxide pigment, fine sand for the base, and clean water. The pigment-to-cement ratio sets the shade.
- Grey cement gives deep, earthy reds. White cement gives brighter or pastel shades but sets faster.
- Red iron oxide comes as a fine powder, sold in packs from ½ kg up to 25 kg bags.
- Water should be clean or treated. Golchha Pigments advises against mineral-rich borewell water.
Oxide-to-cement ratios by source
By weight, pigment : cement| Source | Ratio | Note |
|---|---|---|
| Tata Pigments data sheet | 1:4 to 1:5 | Grey cement for deep shades, white for pastel |
| Golchha Pigments | 1:4 to 1:8 | Depends on colour depth and pigment quality |
| Livspace | up to 1:3 | Gives a dark red; more cement gives a lighter shade |
Check pigment quality before you buy. Tata Pigments lists its floor oxide at 75–80% total iron (as Fe2O3), with no more than 0.75% residue on a BS 240 mesh sieve.
Tata Pigments warns that chalk powder in the mix weakens colour intensity. Cheap or adulterated oxide is a common cause of patchy floors.
How Is Red Oxide Flooring Laid, Step by Step?
Red oxide flooring is laid in two layers: a level cement base, then a thin pigmented topping that is trowelled and polished. A typical sequence runs in seven steps.
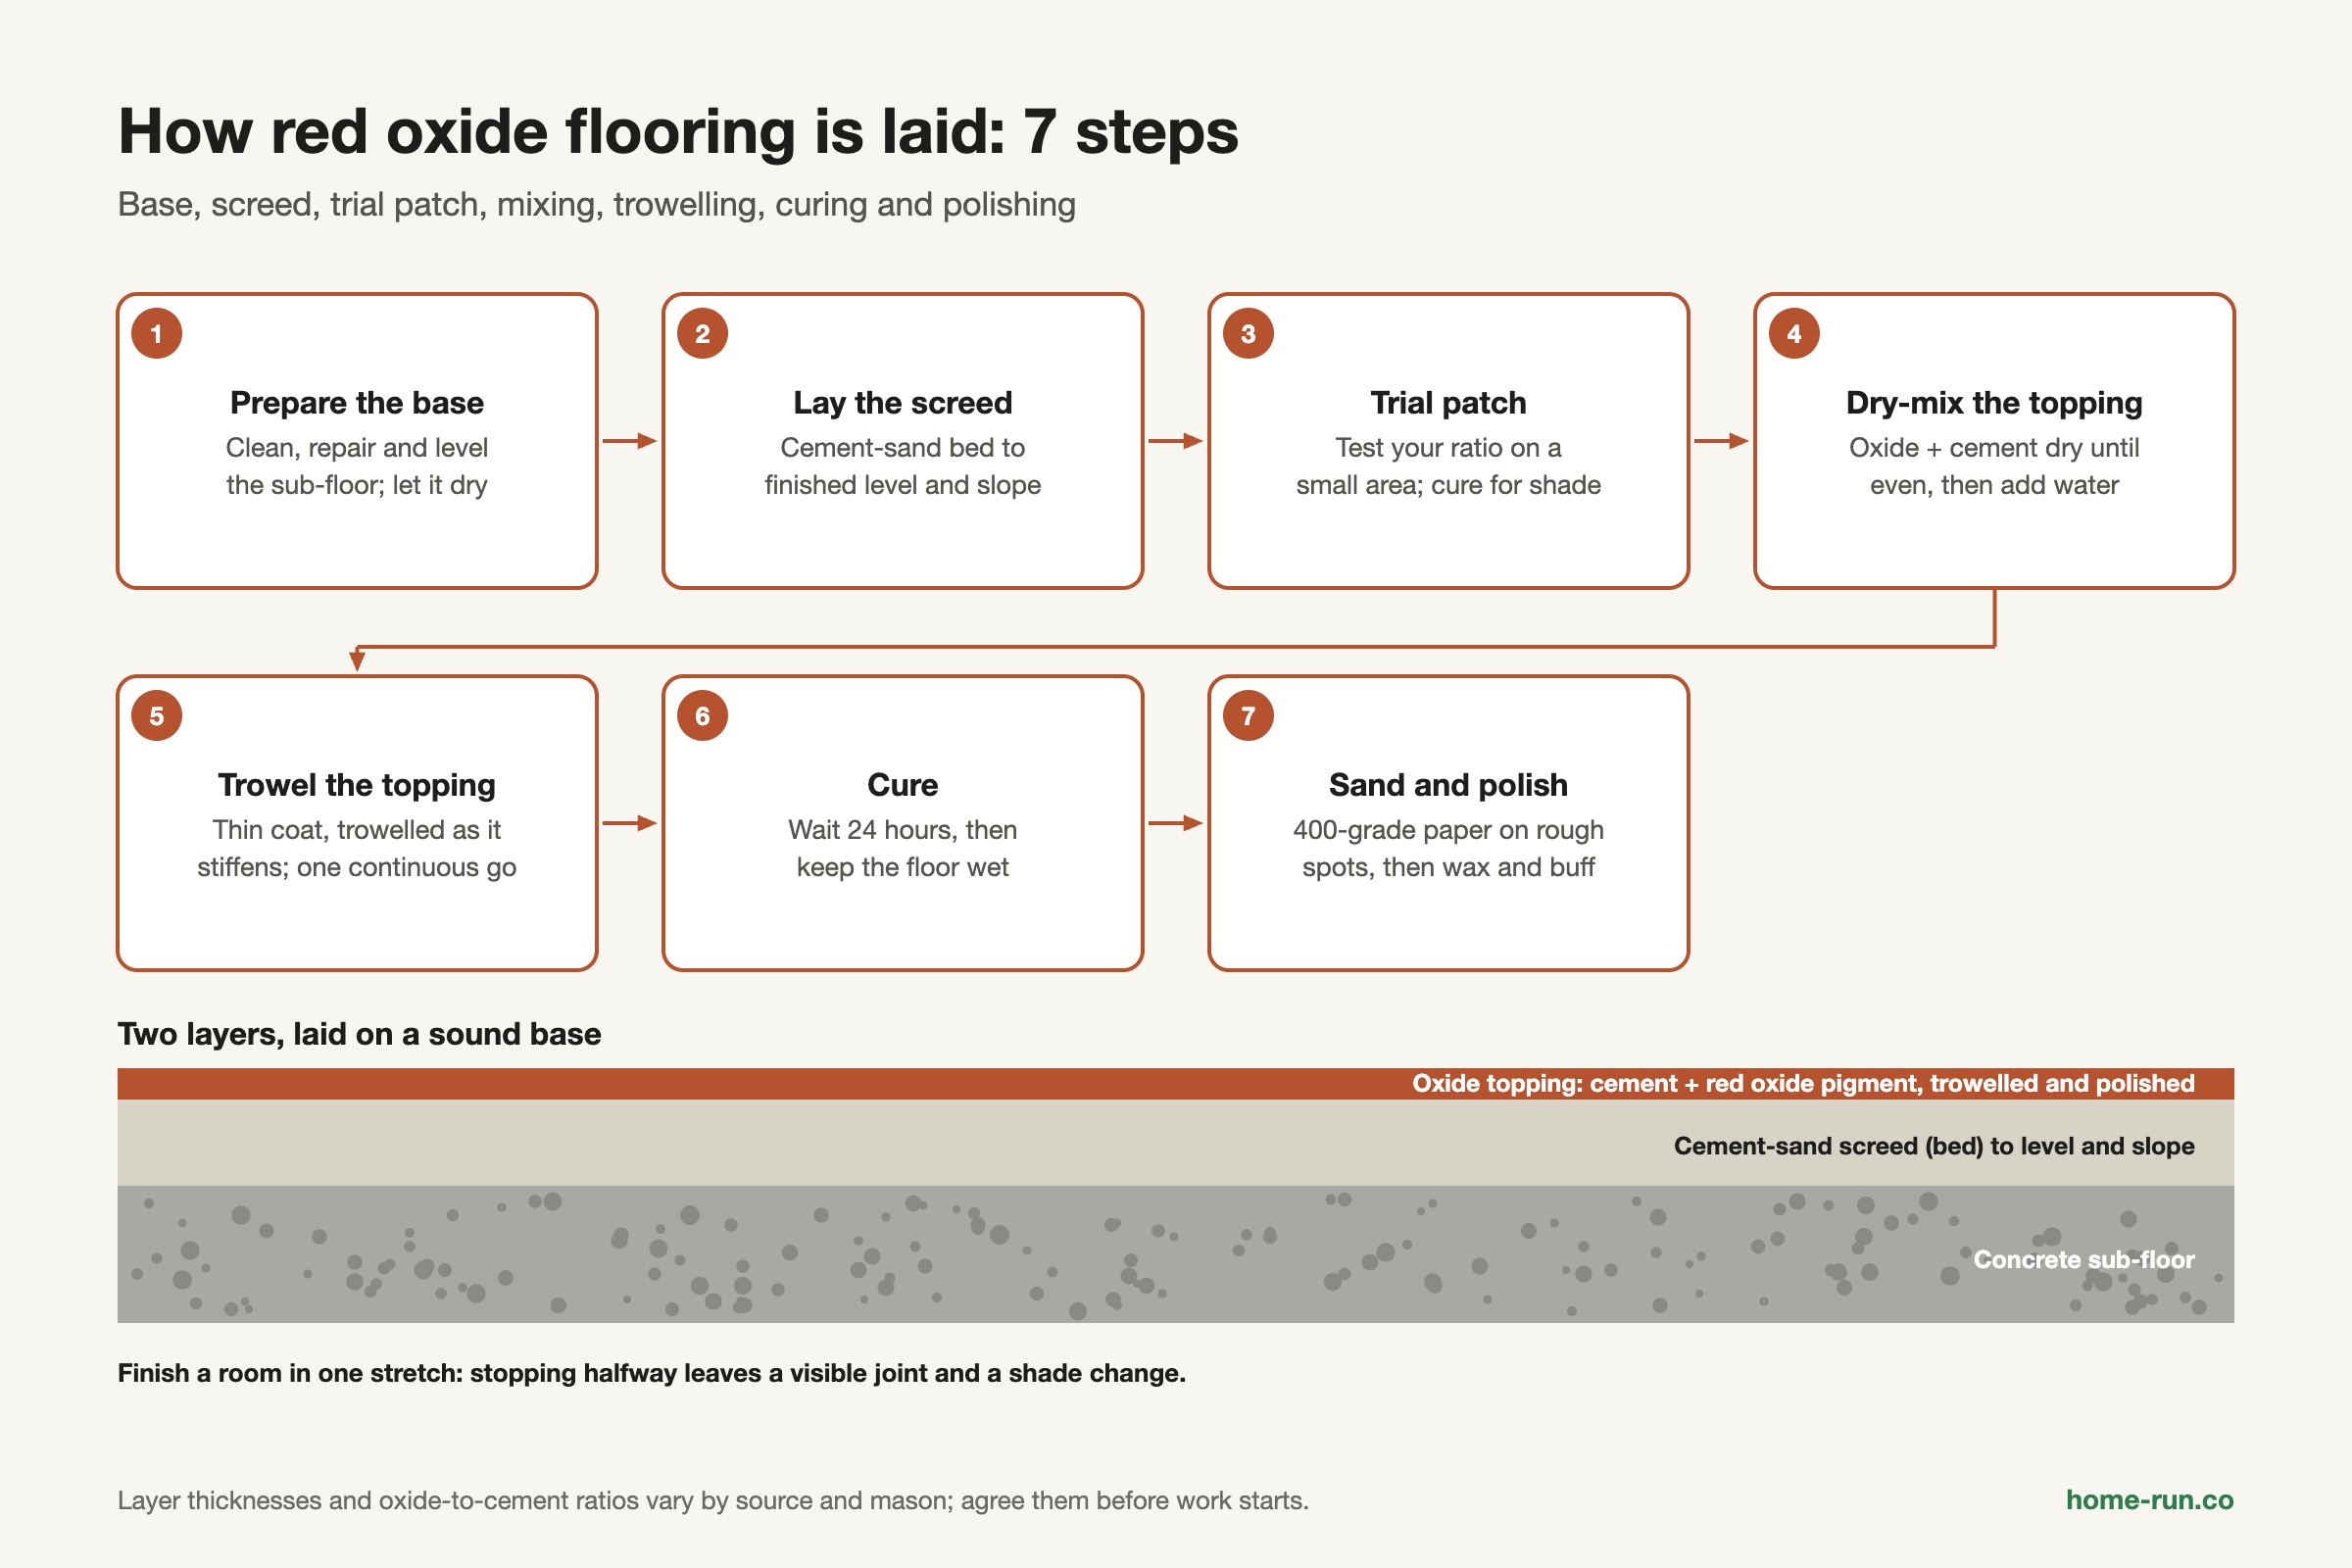
- Prepare the base. Clean, repair and level the concrete sub-floor. Lay the oxide only once the base has fully dried.
- Lay the screed. Spread a cement-sand bed to the finished level and slope.
- Make a trial patch. Test your ratio on a small area and let it cure to see the true shade.
- Dry-mix the topping. Blend oxide and cement dry until the colour is even, then add water slowly. Mix just before use.
- Trowel the topping. Spread a thin coat and trowel it repeatedly as it stiffens. Finish the whole area in one continuous stretch.
- Cure. Wait 24 hours, then keep the floor wet (see the curing timeline below).
- Sand and polish. After the floor dries, smooth any rough spots with 400-grade sandpaper, then wax and buff.
DIY is realistic only for a test patch. For a full room, hire a mason who has laid oxide floors before.
How Long Does the Floor Take to Cure?
Red oxide flooring needs at least a week of curing and drying before polishing. Pigment makers set out the first days like this:
Lay and trowel
Finish the topping in one stretch. Protect it from dust and direct sun.
Start curing after 24 hours
Sprinkle water every 2 to 3 hours for the whole day.
Flood test
Cover the floor with a thin sheet of water to show white patches. Repeat until none appear.
No foot traffic yet
Golchha Pigments advises keeping people off for at least four days.
Buff and polish
Tata Pigments advises polishing only after a week of drying. Longer drying improves hardening.
Some guides keep the floor damp for one to two weeks, so agree the curing plan with your mason first.
If in doubt, cure longer. Rushed curing is the most common cause of hairline cracks, dusting and dull patches.
Can You Lay It Over Existing Tiles or Concrete?
You can lay red oxide flooring over sound concrete, but laying it over old tiles is riskier. Either way, the floor rises in height, so check door clearances first.
Over concrete
Better optionPoint
- Roughen the surface for grip
- Fill cracks and level low spots
- Clean off oil, paint and dust
- Use a bonding coat if your mason advises
Over tiles
Higher riskPoint
- Tap-test and remove any hollow tiles
- Roughen or prime the glaze
- Expect cracks along old tile joints
- Removing the tiles is often safer
Which Rooms Suit a Red Oxide Floor?
Red oxide flooring works best indoors in dry rooms such as bedrooms, living rooms and covered verandas. Kitchens and bathrooms need care because of stains and slip risk.
Room-by-room fit
General guidance| Area | Verdict | Why |
|---|---|---|
| Bedroom, living room Good | Strong fit | Dry, low spill risk, cool underfoot |
| Covered veranda Good | Strong fit | Shaded from direct sun |
| Kitchen Use with care | Possible | Oil, turmeric and acidic spills can stain or etch |
| Bathroom Use with care | Matte finish only | Slippery when wet |
| Open terrace, courtyard Avoid | Not advised | Sun, rain and heat cycles cause fading and cracks |
For wet areas, compare it with vitrified and anti-skid options in our guide to types of tiles. For a patterned heritage look, see mosaic flooring types and benefits.
How Much Does Red Oxide Flooring Cost?
Red oxide flooring costs roughly ₹40 to ₹110 per sq ft, laid and finished, based on 2025–26 published guides. Labour is the biggest and most variable part.
Published red oxide flooring rates
₹ per sq ft, laid and finished| Finish | Rate | Source |
|---|---|---|
| Basic | ₹40–80 | Brick & Bolt, updated Jan 2026 |
| Standard Mid-range | ₹60–110 | Studio Matrx, 2026, excl. GST |
| Premium, multi-layer | ₹100–150 | Studio Matrx, 2026, excl. GST |
For a 12 ft × 14 ft bedroom (168 sq ft), the standard range works out to ₹10,080–18,480 before GST.
Laying an oxide floor?
Get cement, white cement and sand delivered across Bengaluru with a GST invoice.
How Do You Clean and Maintain the Floor?
You maintain red oxide flooring with dry sweeping, a damp mop and occasional waxing. Follow these habits:
- Sweep or dry-mop daily to stop grit scratching the polish
- Mop with plain water or a mild pH-neutral cleaner
- Wipe oil, turmeric and lemon spills straight away
- Re-oil or wax every few months to once a year, then buff
Avoid acids, bleach and harsh floor chemicals. They etch the surface and can lift the colour. Beeswax and coconut oil add shine but do not waterproof the floor.
Watch for these signs of a badly laid floor:
- Wide or spreading cracks, not just fine lines at panel edges
- Patchy shade or white spots after curing
- A dusty, chalky surface that marks your feet
- A hollow sound when you tap the floor
To repair small cracks or dull patches, ask a mason to fill the crack with matching oxide-cement paste, then re-polish and re-oil the area. Keep a little pigment from the original batch for this.