On this page
- When Should You Repaint Your Home?
- Types of Paint for Indian Homes
- Paint Finishes Explained (Sheen Levels)
- The Home Painting Process
- Paint Coverage: How Much Paint Do You Need?
- Home Painting Cost in India (₹ per sq ft)
- Choosing Colours and Combinations
- Tools and Techniques for a Clean Finish
- DIY vs Hiring Professional Painters
- The home painting process runs in a fixed sequence: wall inspection, surface prep, cracks and damp treatment, wall putty, priming, then painting.
- Interior painting costs ₹8–60 per sq ft (materials + labour) in India; exterior costs ₹15–35 per sq ft. A standard 2BHK project runs around ₹1,00,000 depending on paint grade.
- Acrylic emulsion is the right choice for most Indian interior walls — washable, low-odour, available from every major brand. Distemper is cheaper but far less durable.
- For kitchens and bathrooms use a semi-gloss or washable anti-fungal emulsion. For bedrooms and ceilings, matte is the better choice.
Planning a home painting project? Getting the four core decisions right — paint type, surface preparation, quantity, and budget — helps you achieve a smoother finish, avoid unnecessary expenses, and make your paint job last longer.
In this guide we cover paint types, finishes, coverage calculations, step-by-step application, and realistic painting costs in India.
When Should You Repaint Your Home?
Repaint when the walls show visible wear, or every 5 to 7 years for interiors and every 3 to 5 years for exteriors — whichever comes first. A fresh coat does two things: it makes the home look better, and it protects the plaster underneath from damp, dust, and weathering.
Aesthetic and value reasons
A dated colour scheme lowers how a home feels to live in and how it presents to buyers or tenants. Repainting before selling or renting is one of the lowest-cost ways to lift perceived value. A single accent wall in a bedroom or living room can shift the entire mood of a room without a full repaint.
Protective reasons
Paint is not just cosmetic. On exterior walls it is the first line of defence against rain, UV, and fungal growth. On interior walls it seals plaster from humidity, dust, and surface staining. Once the paint film breaks down, the plaster underneath is exposed and deteriorates faster.
Signs it's time to repaint
- Fading or chalking — a powdery white residue when you rub the wall
- Flaking or peeling, especially near windows and wet areas
- Hairline cracks that have opened up since the last coat
- Stains or discolouration that wiping down won't fix
- It's been more than 5–6 years since the last full coat
Avoid painting exteriors during the monsoon. Humidity above 70% prevents paint from curing properly and can cause blistering and peeling within months. In Bengaluru, the dry windows between October and February, and again between March and May, are the best times to paint exteriors. Interior painting can be done year-round as long as rooms are ventilated.
Types of Paint for Indian Homes
The right paint type depends on the surface, the room, and your budget. Here's what's available in India and where each is used.
Interior vs Exterior Paints
Never use an interior emulsion on an exterior wall. Interior paints are formulated for washability and low odour; they are not built to handle extreme weather, UV, and fungal growth. Exterior paints use resins designed to withstand temperature changes, resist moisture, and fight algae. The reverse is also true — exterior paints off-gas more VOCs and are not designed for indoor air.

Primers and Wall Putty
Wall putty (a white cement-based filler) levels out rough plaster, fills fine surface pores, and gives paint a smooth base to sit on. Primer seals the putty, improves adhesion, and cuts the number of topcoats needed for even coverage.
- Alkali-resistant (water-based) primer is standard for most interior and exterior plastered walls. It neutralises the alkalinity of new cement plaster, which would otherwise cause paint to blister or peel.
- Cement primer is used on fresh cement plaster before putty, especially on exterior walls. It penetrates deeper and seals the surface before any topcoat goes on.
Skip putty on a rough wall and the paint sits on an uneven surface — the colour will look patchy. Skip primer and the paint doesn't bond properly, so it starts peeling earlier.
Specialty Paints
Some situations call for a paint formulated beyond the standard emulsion:
- Washable and stain-resistant emulsions — suited to kids' rooms and high-traffic areas. The film handles repeated scrubbing without dulling or peeling.
- Anti-fungal and waterproofing paints — for bathrooms, kitchens, and walls with recurring damp or mould. These use biocide additives that inhibit fungal and algae growth.
- Low-VOC and eco emulsions — release fewer chemicals into indoor air during and after application. They cost slightly more but produce less odour and contribute to better indoor air quality.
Paint types available in India
Indicative ₹/litre · Sep 2026| PAINT TYPE | WHERE USED | FINISH/NOTE |
|---|---|---|
| Distemper Budget | Acrylic emulsion | Premium emulsion |
| Budget interiors and rental properties | Most interior walls | Bedrooms, living rooms, premium interiors |
| Matte, low durability, 2–3 yr life | Washable, low odour, durable | Superior finish, stain-resistant, highly washable |
Everything on this list, at your door in 60 minutes
Interior and exterior paints, primers, wall putty and painting essentials from Asian Paints, Berger, Nerolac and Dulux — genuine stock, GST invoice.
Paint Finishes Explained (Sheen Levels)
The sheen of a paint determines how shiny it looks and how easy it is to clean. The higher the sheen, the more washable the surface — but the more it shows every crack, bump, and roller mark on the wall.
Use matte in rooms where looks matter more than cleaning, and semi-gloss or satin in rooms where walls take abuse.
Best finish by room
- Bedrooms and ceilings — matte. Bedrooms are low-traffic, and matte gives a calm, soft look that hides ceiling imperfections well.
- Living rooms and hallways — eggshell or low-sheen. These areas see more footfall and occasional scuff marks; a slight sheen adds durability without looking glossy.
- Kids' rooms — satin. Crayon marks, handprints and other stains wipe off a satin surface without damaging the paint film.
- Kitchens and bathrooms — semi-gloss or a washable anti-fungal emulsion. These rooms have moisture, steam and grease; the finish needs to handle scrubbing and resist mould.
- Doors, grilles, wood trim — gloss. These surfaces take the most physical contact, and a hard, high-sheen finish is the only one that holds up.
The Home Painting Process
A high-quality paint job depends more on preparation than painting itself. Professionals often spend 60–70% of the project time inspecting, repairing, sanding and priming walls before applying the final coats.
Step 1 · Site inspection and surface evaluation
Before any paint is ordered, check the walls. Run your hand along the surface — if it feels powdery or comes away chalky, the old paint is failing and needs scraping before any new coat goes on. During inspection, check for damp patches, water seepage, hairline or structural cracks, flaking paint, chalking surfaces, nail holes and dents, and uneven plaster.
Professional painters also check whether the wall was previously painted with distemper, emulsion or enamel, as this affects surface preparation and primer selection. This inspection decides the prep scope and the project quote — be thorough, because surprises during painting only add cost and delay.
Before starting paint work, make sure all electrical work is complete. Read our House Wiring Guide to avoid rework after painting.
Step 2 · Surface preparation and crack treatment
This stage has the biggest impact on how smooth the finished walls look and how long the paint lasts. A properly prepared surface should be clean, dry, and free from loose paint, dust, grease and moisture. Typical preparation includes:
- Scraping off peeling or flaking paint
- Removing dust and dirt
- Filling nail holes and minor dents
- Repairing hairline cracks
- Treating damp patches before painting
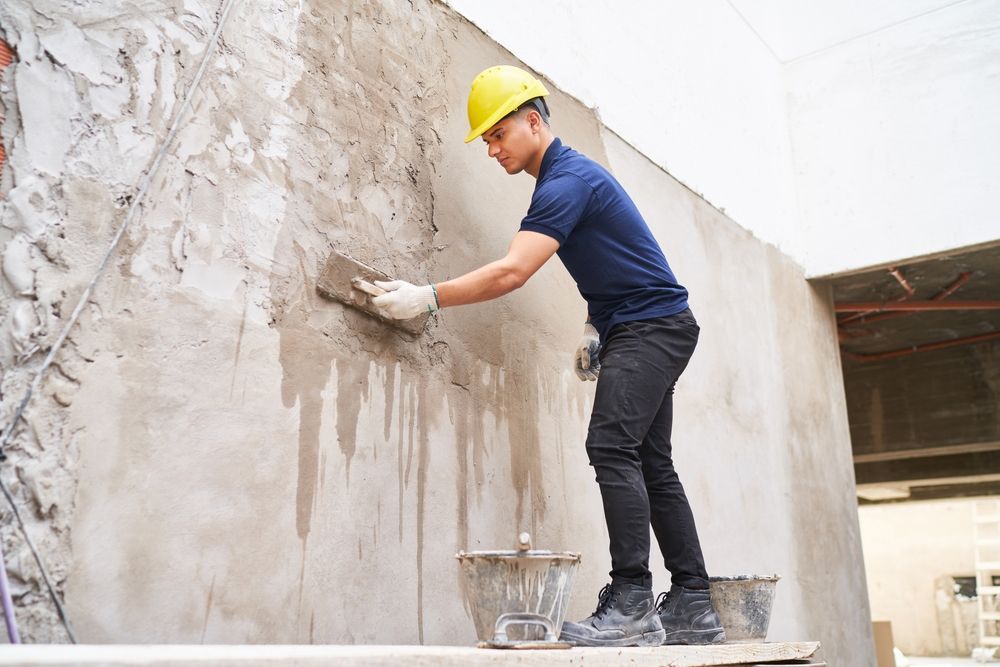
Step 3 · Wall putty, sanding and priming
Wall putty fills tiny pores and imperfections that remain after plastering. Apply one coat for smoother walls and two coats for uneven surfaces or fresh plaster. Sand with fine sandpaper to remove excess putty and create an even surface for the primer, and let each coat dry completely before sanding.
Primer acts as the bonding layer between the wall and the paint. It improves paint adhesion, reduces paint absorption, delivers more even colour, increases durability, and lowers the number of finish coats required.
New walls almost always require primer. Repainting projects may still benefit from a fresh primer coat if the existing paint is heavily stained, has been repaired, or you're changing from a dark colour to a lighter shade.
Step 4 · Base coat and topcoats
Most interior painting projects include one primer coat, one base coat, and one or two finish coats. The first coat provides the foundation for colour development; the final coat creates uniform colour, sheen and durability. Let the base coat dry fully before the second — rushing recoat intervals causes uneven sheen and wrinkling.
- Stir the paint thoroughly before application.
- Thin the paint only if recommended by the manufacturer.
- Maintain consistent roller pressure to avoid streaks and lap marks.
Step 5 · Final coat and quality check
Inspect the walls under good lighting. Check for missed spots or thin patches where the previous colour shows through, roller marks and texture inconsistencies, and cut-line sharpness against trim, ceiling and door frames.
Touch up under good light immediately after the final coat, while the paint is still wet enough to blend. Touching up dry paint later will leave a visible patch.
Step 6 · Cleanup and handover
The final stage involves cleaning the work area and allowing the paint to cure. Professional cleanup includes removing masking tape, cleaning paint spills, reinstalling switch plates and fixtures, disposing of leftover materials responsibly, and storing extra paint for future touch-ups.
Drying means the paint surface is dry to the touch and ready for the next coat or light use. Curing is a chemical process where the paint fully hardens and develops its maximum durability, stain resistance and washability. Rushing either stage is one of the most common ways to damage a fresh paint job.
Inspect and prep
Move or cover furniture, scrape loose paint, repair minor cracks, fill nail holes, sand surfaces, clean dust.
Wall putty, coat 1
First putty coat across all walls.
Putty coat 2 + sanding
Second coat, then sand to a smooth finish.
Primer
One coat of primer over the full prepared surface.
Handover
Remove masking tape and allow the paint to dry before moving furniture back.
A fresh full-paint job (putty + primer + 2 coats) on a 2BHK typically takes 7–10 days with a team of 2 painters. A repaint on sound walls (light prep + primer + 2 coats) takes 5–7 days.
Paint Coverage: How Much Paint Do You Need?
One of the first questions you'll ask before buying paint is how many litres you actually need. Here's how to estimate before you shop.
Home Painting Cost in India (₹ per sq ft)
The cost of painting a home depends on surface preparation, wall condition, labour charges, paint grade, and the number of coats — all of which influence the final price.
What drives the cost
- Paint grade — the single biggest variable. Switching from an economy emulsion to a luxury product can double your material cost alone.
- Wall condition — sound walls need only primer. Cracked, damp, or previously distempered walls need full putty work, which adds ₹10–20/sq ft to prep costs.
- Number of coats — 2 coats is standard. Dark or saturated colours and rough surfaces may require a third; factor it into both material and labour.
- Height and access — multi-storey exteriors need scaffolding, which adds ₹5–10/sq ft to labour.
- City and labour market — labour cost in metro cities is higher than in smaller cities or towns.
Contractors usually quote cost per sq ft on painted area, not carpet area. A 1,000 sq ft carpet-area apartment has roughly 3,000–3,500 sq ft of paintable wall surface
Always confirm which area is being quoted before you compare two prices.
Materials (paint, putty, primer) typically account for 40–60% of a fresh painting job. Labour is 30–40%, with scaffolding, masking and disposal making up the rest. On a premium job with luxury emulsion, materials take a larger share.
Get a site measurement and a written scope. Try the HomeRun Construction Cost Calculator for a full material and cost breakdown across all 13 categories, not just paint.
Choosing Colours and Combinations
Once paint type and finish are decided, colour is the next call. A few practical rules make the decision easier.
Start with light and room size
Lighter shades — off-white, pale cream, soft grey — reflect more natural light and make a room feel larger than it is. This matters especially in smaller Indian apartments where rooms are 100–150 sq ft. Limit darker or richer tones to one feature wall: a deep teal or terracotta accent adds depth without making the room feel closed in, while the other three walls stay neutral.
Coordinate with what's already in the room
- Warm floors (teak, red oxide, warm wood laminates) pair naturally with warm wall tones — cream, peach, warm beige, soft terracotta.
- Cool floors (white or grey tiles, stone) suit cooler wall tones — off-white, pale grey, soft sage green.
- North-facing rooms get less direct sunlight. Use warm undertones like cream, warm white and pale yellow to prevent a cold, flat look.
- South-facing rooms get strong afternoon light. Cooler, lighter shades balance the brightness without washing out.
— the color badges where not available in the data table
Tools and Techniques for a Clean Finish
Whether you're painting yourself or supervising professional painters, understanding the right tools and application techniques helps achieve a cleaner, longer-lasting finish.
Tools you need
- Rollers — 9-inch for walls, 4-inch for trim. Short nap (6–9 mm) for smooth putty walls, medium nap (12–15 mm) for slightly textured surfaces.
- Brushes — 2–3 inch angled brush for cutting in edges, corners and around fixtures.
- Paint tray and grid — keeps the roller evenly loaded.
- Putty knife and scraper — for crack filling and old paint removal.
- Keep rooms well ventilated during painting
- Wear eye protection when sanding ceilings or scraping overhead
DIY vs Hiring Professional Painters
DIY home painting is realistic for one-room projects, touch-ups, or if you have time, patience and basic painting tools, and are comfortable using rollers. A small bedroom or a feature wall of 300–400 sq ft is manageable over a weekend with the right prep.
Do it yourself
Weekend jobWorks when the scope is small and the walls are sound.
- One room, a feature wall, or touch-ups
- 300–400 sq ft manageable in a weekend
- Walls already smooth and dry
- You own or can borrow roller, tray, brushes, sandpaper
- No ceiling height or access problem
Hire a professional
RecommendedNecessary once scope, height or wall repair enters the picture.
- Complete home painting
- Fresh painting of newly constructed homes
- Exterior walls
- High ceilings and staircases
- Homes requiring wall repairs or damp treatment
Repainting a room or the whole home?
Primers, paints, wall putty and painting tools from verified brands, delivered in 60 minutes anywhere in Bengaluru.