On this page
- What Does Wall Putty Do on a Living Room Wall?
- Which Wall Putty Designs Suit a Living Room?
- How Do You Choose the Right Wall Putty Texture for Your Living Room?
- How Is a Wall Putty Design Applied in a Living Room?
- How Much Wall Putty Does a Living Room Need?
- What Does a Wall Putty Design for a Living Room Cost?
- How Do You Keep a Textured Living Room Wall Looking Fresh?
- Most living rooms look best with one textured feature wall and smooth putty on the rest.
- Pick the texture by light and room size: fine textures for small rooms, deeper ones for large walls.
- Side light shows texture; a light placed within about 30 cm of the wall makes the pattern stand out.
- Budget about ₹80–100 per sq ft for a smooth texture and up to ₹200 for pebbled finishes in Bengaluru.
- New plaster needs 28 days of curing before putty, or the design can crack and peel.
A wall putty design for living room walls is a pattern or texture made with putty, then painted, on one or more walls of the hall. The most common choice is a textured feature wall behind the TV or sofa.
The design and the room work together. Your light, furniture and wall size decide which texture looks rich and which looks busy.
This guide covers living rooms only. For every texture type and the full method, see our main guide to wall putty design ideas.
What Does Wall Putty Do on a Living Room Wall?
Wall putty fills fine cracks and pores in plaster and gives paint a smooth, even base. On a feature wall, the same putty is shaped with trowels, sponges or combs to form a texture.
Two putty types are sold in India. White cement-based wall putty is a powder mixed with water. Acrylic wall putty is a ready-to-use paste made with acrylic polymers.
White cement vs acrylic wall putty
Coverage from product sheets| Putty type | Form | Coverage (2 coats) | Best for in a living room |
|---|---|---|---|
| White cement-based Feature walls | Powder, mixed with water on site | 10–20 sq ft/kg | Textured designs, walls with mild damp risk |
| Acrylic | Ready-mixed paste | 24–35 sq ft/kg | Smooth base coats on dry interior walls |
Plaster is the thick cement-sand coat that covers brickwork. Putty is a thin finishing layer over cured plaster. A putty texture cannot hide a wavy or hollow plaster wall, so fix the plaster first.
Which Wall Putty Designs Suit a Living Room?
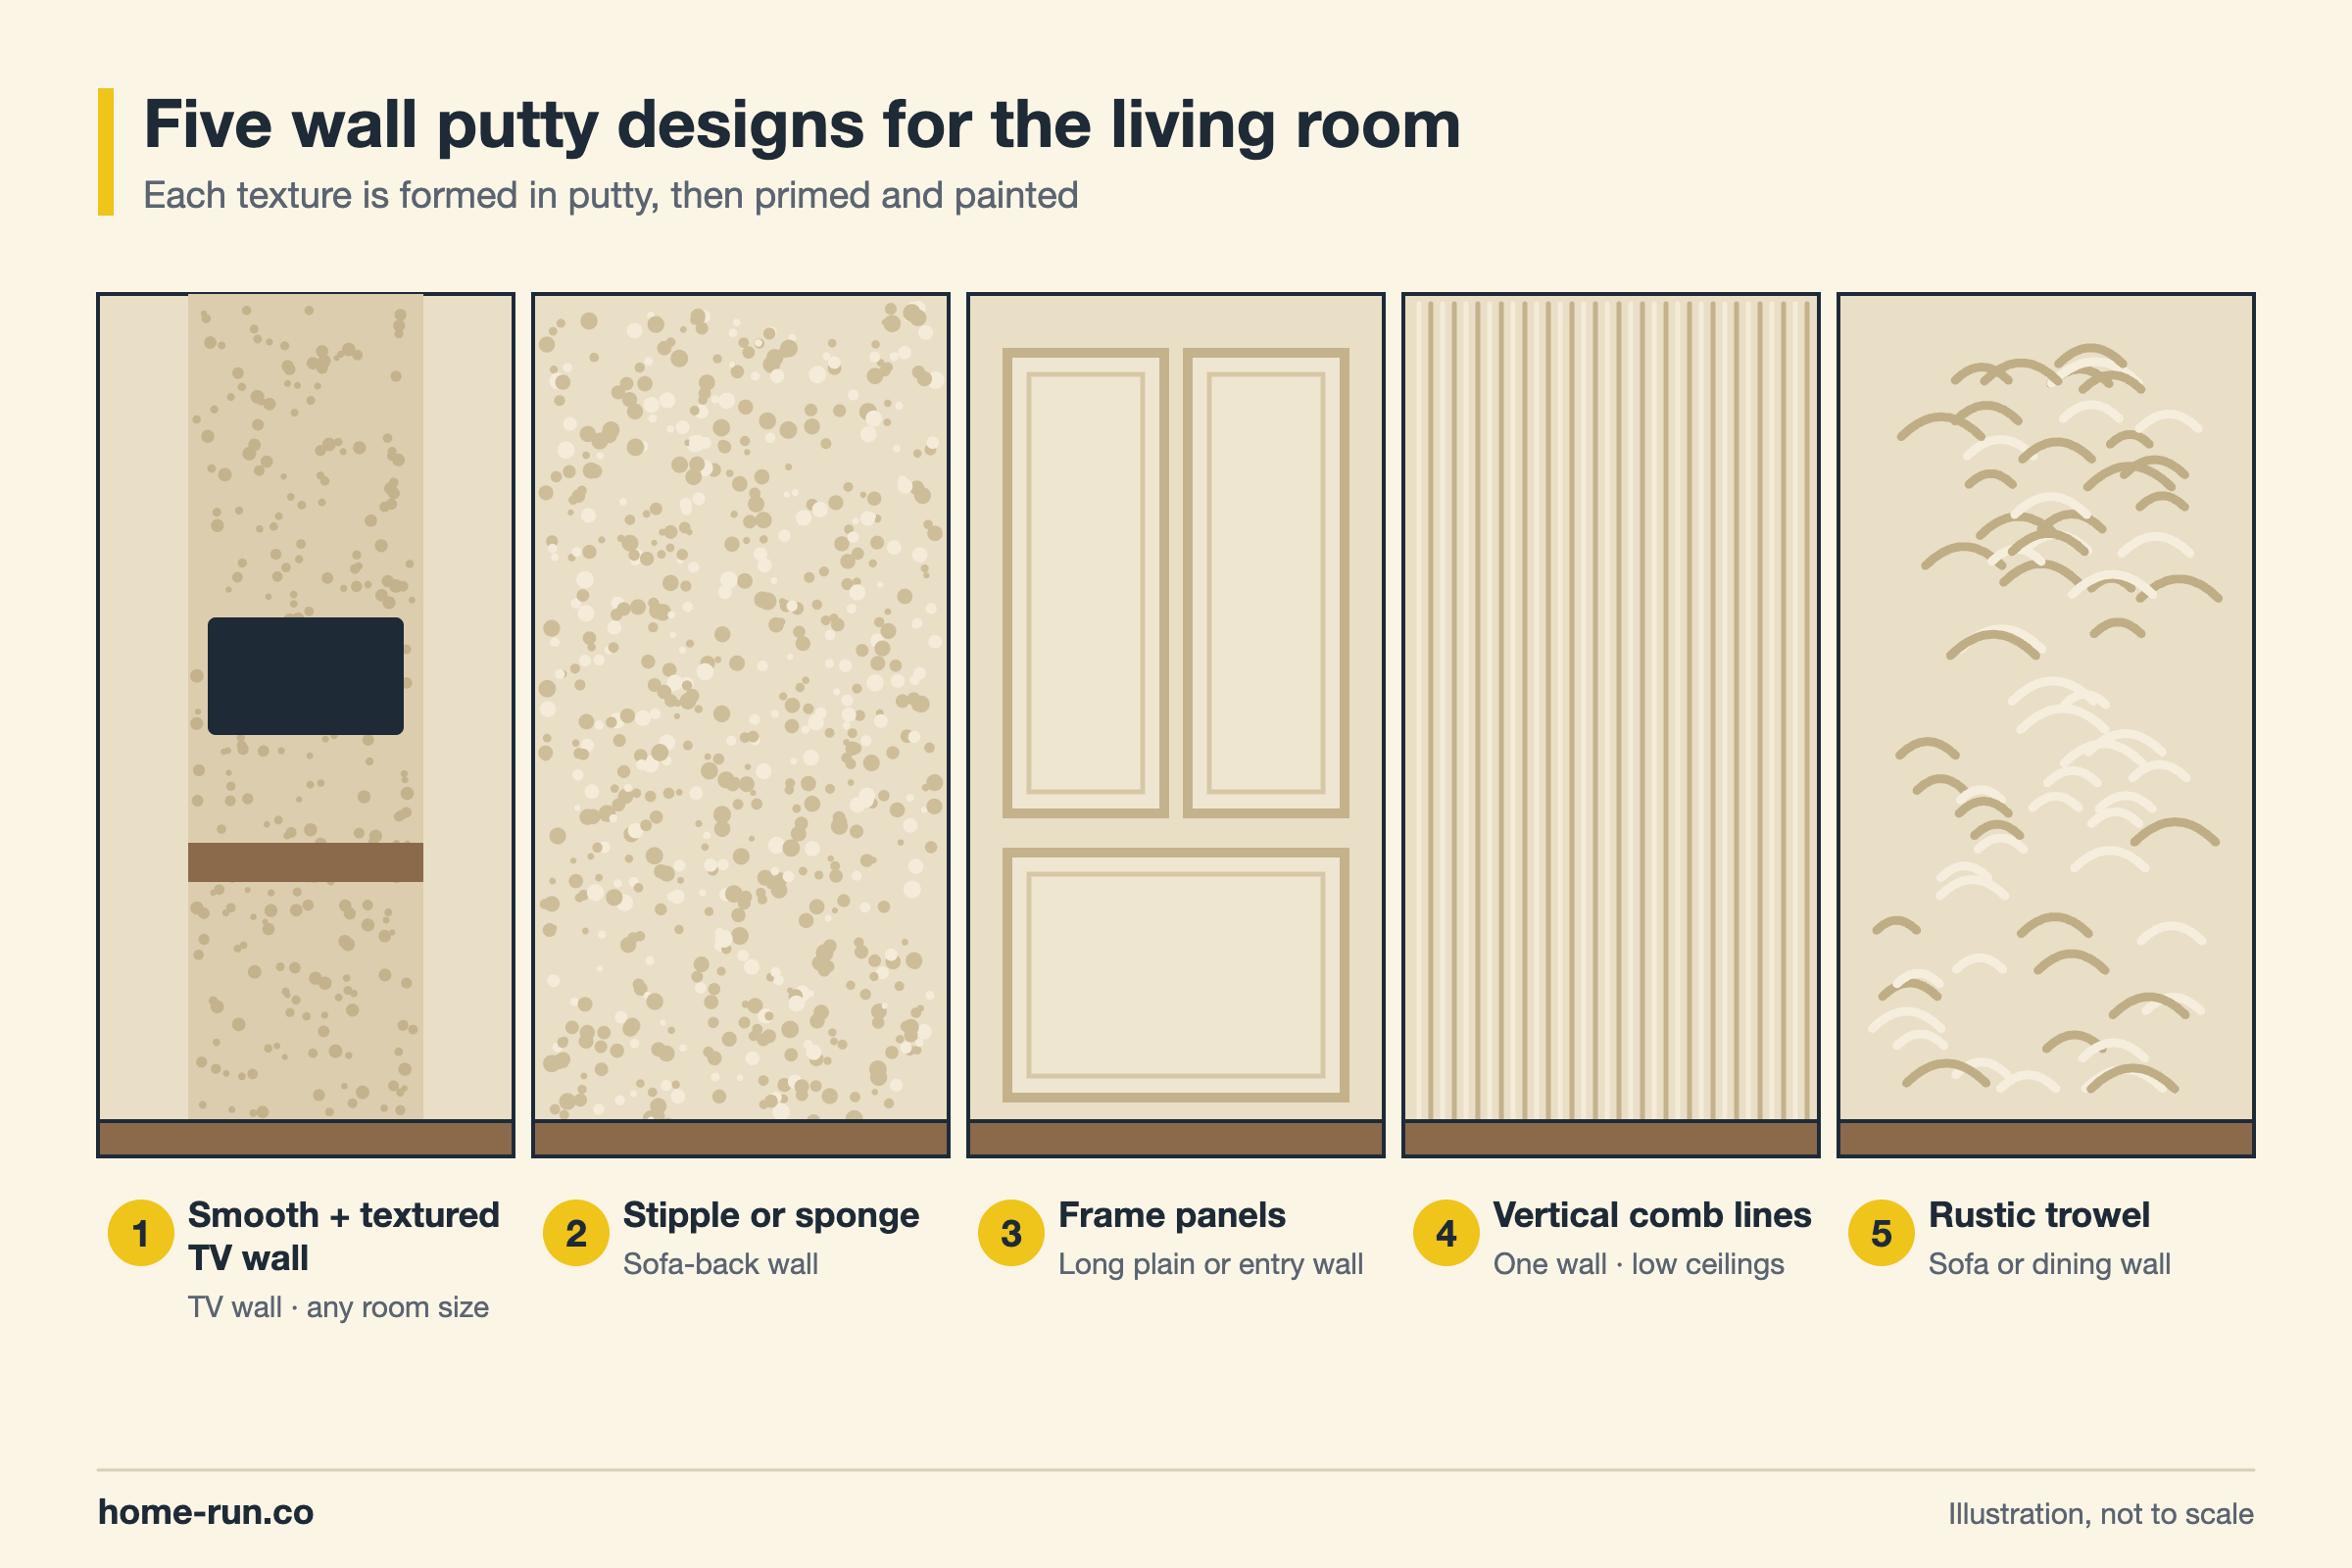
The wall putty designs that suit a living room best are a smooth base with one textured accent, a sofa-back texture, a frame design, a simple 3D relief and a rustic trowel finish. Each works on a different wall and light.
1. Smooth walls with one textured TV wall
Keep three walls smooth and texture only the TV wall. The wall behind the screen gets the most attention, so it carries the design. This is the simplest modern wall putty design for living room spaces of any size.
2. Stipple or sponge texture behind the sofa
A stipple texture is made by dabbing wet putty with a sponge or stiff brush. The soft, fine grain suits the wall behind a sofa, where people lean and the texture should not scratch.
3. Wall putty design frame panels
A wall putty design frame is a set of raised rectangles or arches shaped in putty on a plain wall. Frames give a classic panelled look, similar to wainscoting, without wood. Painting the frames one shade lighter than the wall makes them stand out.
4. Simple 3D wall putty design for the living room
A 3D wall putty design builds raised shapes, such as waves, diamonds or circles, a few millimetres proud of the wall. Keep 3D work to one small wall or a niche behind the TV unit, because deep relief collects dust.
5. Vertical line or comb texture for low ceilings
A comb texture drags a notched trowel through wet putty to leave straight lines. Vertical lines draw the eye upwards, which helps a living room with a low ceiling feel taller.
6. Rustic trowel or stone-effect wall
A rustic trowel finish spreads putty in uneven, overlapping strokes and adds a darker glaze in the hollows. Earthy colours such as terracotta, olive and sand suit this look, along with wood and cane furniture.
7. Metallic or pearl coat over a fine texture
A metallic or pearl topcoat over a fine texture shimmers under evening lamps. Paint brands such as Asian Paints sell special-effect texture ranges for this; use them on one wall only.
Texture the wall you look at first when you walk in. Leave the other walls calm so the design has room to breathe.
HomeRun Team
Living room wall putty designs at a glance
Pick by wall and room size| Design | Best wall | Room size | Upkeep |
|---|---|---|---|
| Smooth + textured TV wall Default pick | TV wall | Any | Easy |
| Stipple or sponge | Sofa-back wall | Small to medium | Easy |
| Frame panels | Long plain wall, entry wall | Medium to large | Easy |
| Simple 3D relief | Niche or TV unit wall | Medium to large | Dusts in grooves |
| Vertical comb lines | Any one wall | Low-ceiling rooms | Moderate |
| Rustic trowel Rustic look | Sofa or dining wall | Medium to large | Moderate |
| Metallic over texture | TV wall | Any | Shows hand marks |
How Do You Choose the Right Wall Putty Texture for Your Living Room?
Choose a wall putty texture for your living room by room size, light, furniture style and how much the wall gets touched. Fine textures suit small rooms; deep textures need a large wall and distance to look good.
- Room size: in a compact hall, pick a fine stipple or smooth texture. Deep 3D or rustic textures can make a small room feel crowded.
- Light: light skimming across a wall shows texture, and flat front light hides it. Lighting designers place grazing lights within about 30 cm of the wall.
- Window direction: a wall beside a window gets side light by day, so even a mild texture shows. A wall facing the window looks flatter.
- Furniture style: match clean lines and modern sofas with smooth, metallic or frame designs. Match wood, cane and earthy fabrics with rustic textures.
- Touch and traffic: walls beside sofas, doors and passages need a fine, washable finish, not sharp relief.
Stand where you sit most. If you view the wall from across a large room, a bolder texture works. If you sit close to the wall, keep the texture fine.
How Is a Wall Putty Design Applied in a Living Room?
A wall putty design is applied by preparing the plaster, laying two smooth putty base coats, priming, forming the texture, then painting.
- Check the plaster. New plaster needs 28 days of curing before putty. Fix damp patches first; our guide to the causes of wall dampness helps you find the source.
- Clean and repair. Scrape off loose paint, dust and grease. Fill cracks and dents before the first coat.
- Mask the edges. Tape the skirting, switchboards, ceiling line and the TV bracket points.
- Apply two base coats. Spread thin coats with a putty knife. For acrylic putty, leave 4–6 hours between coats.
- Sand and dust off. Sand with 180-grit sandpaper and wipe the wall clean.
- Prime the wall. Apply one coat of interior primer so the texture and paint bond evenly.
- Form the texture. Work the design from one edge of the wall to the other without stopping halfway.
- Paint. Once the texture is dry, apply two coats of interior emulsion, or the glaze for the chosen effect.
Putty on a damp wall, one thick coat instead of two thin ones, and skipping primer all lead to cracks or peeling. Stopping a texture mid-wall leaves a joint line that shows under evening light.
DIY
Smooth finishPoint
- Lower cost; you pay only for materials
- Fine for smooth putty and simple stipple
- Uneven patterns are hard to redo
Professional applicator
Feature wallPoint
- Labour adds to the per sq ft rate
- Needed for frames, 3D and metallic work
- Even pattern across the whole wall
How Much Wall Putty Does a Living Room Need?
A 16 × 12 ft living room with a 10 ft ceiling needs about 26–34 kg of white cement putty for two smooth coats, before wastage. Divide the wall area by the putty's coverage, then add 10%.
Starting your living room wall?
Wall putty, primer and paint delivered across Bengaluru.
What Does a Wall Putty Design for a Living Room Cost?
A wall putty design for a living room costs about ₹80–100 per sq ft for a smooth texture in Bengaluru, with labour and material. Metallic textures cost about ₹100–150 and pebbled textures ₹150–200 per sq ft.
Feature wall cost in Bengaluru
14 × 10 ft TV wall = 140 sq ft| Texture | ₹ per sq ft | 140 sq ft wall |
|---|---|---|
| Smooth texture Budget | ₹80–100 | ₹11,200–14,000 |
| Metallic texture | ₹100–150 | ₹14,000–21,000 |
| Pebbled texture | ₹150–200 | ₹21,000–28,000 |
Plain putty is a small part of the bill. A 30 kg bag of Birla White WallCare putty is listed at ₹700 on HomeRun (November 2026), and Asian Paints TruCare acrylic putty at ₹1,380 for 20 kg.
- Design complexity: frames, 3D relief and multi-layer metallic effects take more labour hours than a single stipple coat.
- Wall condition: crack repair, damp treatment or replastering adds cost before any design work.
- Height and access: double-height living rooms need scaffolding, which raises labour charges.
How Do You Keep a Textured Living Room Wall Looking Fresh?
Keep a textured living room wall fresh by dusting it every few weeks, spot-cleaning gently and touching up chips early.
- Dust grooves and 3D relief with a soft, dry brush or a vacuum brush head.
- Wipe marks on washable emulsion with a damp cloth; do not scrub the texture.
- Keep a small tin of the same paint and note the shade code for touch-ups.
- Fill small chips with putty, sand lightly, then repaint only that panel edge to edge.
- Watch for damp patches near bathrooms or external walls and fix the source quickly.
- Leave a gap between the sofa back and a rough texture to avoid scuffs.
Pick your feature wall, texture and colour, then get a written quote per sq ft from an applicator. If a false ceiling is planned, finish it before the texture; see our POP ceiling designs for the drawing room.