


0 items
Rs. 0.00
Please enter Pincode to check delivery time & serviceability
Item added to your cart

In stock
Couldn't load pickup availability
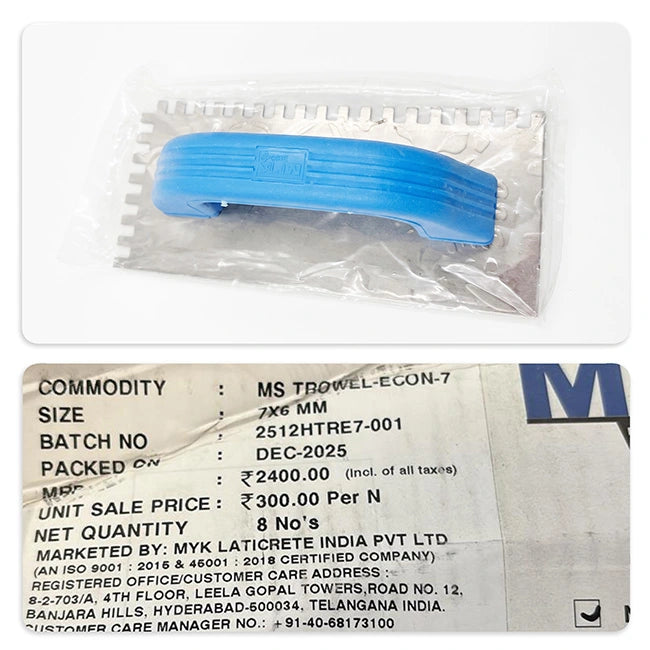
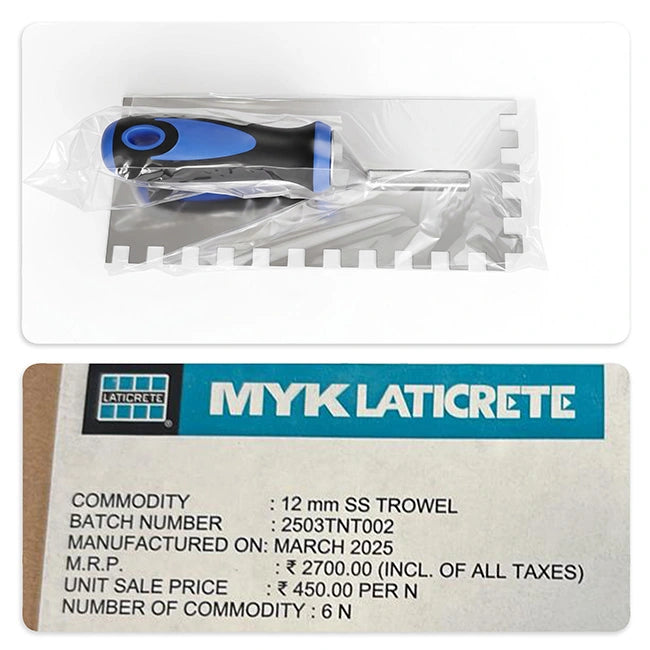
MYK Laticrete Notch Trowel is a stainless steel trowel used to apply tile adhesive in a consistent, ridged pattern before laying tiles. Available in three variants - Econ 4 (6mm notch), Econ 7 (7mm notch), and Econ 12 (12mm notch) - each sized for a different tile format. The notch size determines how much adhesive is deposited: a 6mm notch for small tiles, 7mm for medium tiles, and 12mm for large-format tiles that need a thicker adhesive bed. When the tile is pressed down, the ridges collapse to give full coverage underneath.
Use the flat side first to spread adhesive across the surface, then comb through it at a 45-degree angle with the notched edge to create the ridges. Stainless steel construction resists corrosion and is easy to clean - rinse immediately after use before the adhesive sets. Compatible with all standard tile adhesive mortars including MYK Laticrete range.
| Specification | Details |
|---|---|
| Brand | MYK Laticrete |
| Product Type | Notch Trowel |
| Material | Stainless steel blade with ergonomic handle |
| Variants | Econ 4 (6x6mm), Econ 7 (7x6mm), Econ 12 (12x12mm) |
| Variant | Notch Configuration | Best For |
|---|---|---|
| Econ 4 | 6x6mm square (paste gap 6mm, height 6mm) | Small tiles up to 300mm - mosaic, kitchen backsplash, and bathroom wall tiles |
| Econ 7 | 7x6mm rectangular (paste gap 7mm, height 6mm) | Medium tiles 300mm to 600mm - standard floor and wall tiles most commonly used in Indian homes |
| Econ 12 | 12x12mm square (paste gap 12mm, height 12mm) | Large-format tiles above 600mm - vitrified slabs, large marble, and full-body porcelain tiles |
Note: Actual blade measurements differ from package sizes to ensure correct adhesive ridges when troweled at a 45° angle.
Choose based on your tile size. Econ 4 (6mm notch) is for small tiles up to 300mm - mosaic, kitchen backsplash, and small bathroom wall tiles. Econ 7 (7mm notch) is for medium tiles between 300mm and 600mm - the most commonly used size for standard Indian floor and wall tiles. Econ 12 (12mm notch) is for large-format tiles above 600mm - vitrified slabs, large marble, and full-body porcelain. Using too small a notch on a large tile leaves insufficient adhesive and causes tile failure; using too large a notch on a small tile wastes adhesive and creates excess squeeze-out at the grout joints.
The number refers to the notch size in millimetres - which determines how much adhesive is deposited on the surface per ridge. A 6mm notch deposits a thin adhesive layer suitable for small, lightweight tiles; a 12mm notch deposits a much thicker layer needed to fully support and bond large, heavy tiles. The depth of the adhesive bed after the ridges collapse under the tile is approximately 65-70% of the notch height.
Larger tiles are heavier and have a bigger surface area - they need more adhesive to achieve full coverage underneath (minimum 80% contact area for floor tiles, 90% for wall tiles per IS standards). A small notch deposits too little adhesive for a large tile, leaving voids beneath the tile that cause hollow spots, cracking, and eventual failure - especially on floors under foot traffic. The Econ 12 ensures enough adhesive is applied for large-format tiles to bond fully and stay flat.
Hold the trowel at 45 degrees to the surface when dragging the notched edge through the adhesive. This angle creates consistent notch depth across the full area. If you hold it at a steeper angle (closer to 90 degrees), the ridges are taller and you deposit more adhesive; at a shallower angle, the ridges are flatter and you deposit less. Keep the angle consistent throughout the area you are tiling for even coverage.
Rinse with water immediately after use - before the adhesive begins to set. A quick rinse takes seconds; removing dried adhesive takes much longer and risks damaging the notch edges. For partially dried adhesive, soak in water for 10-15 minutes then scrape off. Store in a dry place. Stainless steel resists rust under normal conditions, but consistent cleaning extends the sharpness of the notch edges and the life of the tool.


0 items
Rs. 0.00
